Understanding Skin Whitening and Face Masks
The quest for a brighter, more even skin tone has led many to explore various skincare solutions. Among these, DIY whitening face masks have gained significant popularity. These homemade concoctions offer a natural and often affordable alternative to commercial products. This guide delves into the secrets of crafting effective whitening face masks, exploring the science behind skin lightening, the best ingredients to use, and how to safely incorporate these masks into your skincare routine. By understanding the fundamentals, you can embark on a journey to healthier, more radiant skin from the comfort of your home. This approach allows you to personalize your skincare, catering to your skin’s unique needs and preferences, while avoiding harsh chemicals and preservatives often found in store-bought options.
What is Skin Whitening
Skin whitening, also known as skin lightening or bleaching, is a cosmetic process aimed at reducing the melanin pigment in the skin to achieve a lighter complexion. Melanin is produced by melanocytes, specialized cells in the skin, and its production is influenced by various factors, including genetics, sun exposure, and hormonal changes. Whitening products work by inhibiting melanin production or accelerating the shedding of pigmented skin cells. The effectiveness of these treatments varies depending on the active ingredients and the individual’s skin type. Understanding the process behind skin whitening is essential before starting any DIY treatments, as it helps in making informed decisions and setting realistic expectations. The goal should always be to improve skin health and achieve a natural, healthy glow, rather than drastically altering skin color.
Benefits of Using Face Masks for Whitening

Face masks offer a concentrated and targeted approach to skincare, making them an excellent vehicle for delivering skin-whitening ingredients. Unlike regular cleansers or moisturizers, face masks typically stay on the skin for a longer period, allowing the active ingredients to penetrate deeper and work more effectively. DIY face masks provide several advantages. They allow you to control the ingredients, ensuring that you use natural and potentially safer options. Moreover, face masks hydrate, exfoliate, and nourish the skin, contributing to an overall improvement in skin health beyond just whitening. Regular use of face masks can help reduce hyperpigmentation, even out skin tone, and enhance the skin’s natural radiance. The personalized nature of DIY masks also means you can tailor recipes to address specific skin concerns and preferences, making them a versatile addition to any skincare routine.
DIY Whitening Face Mask Ingredients
Common and Effective Ingredients
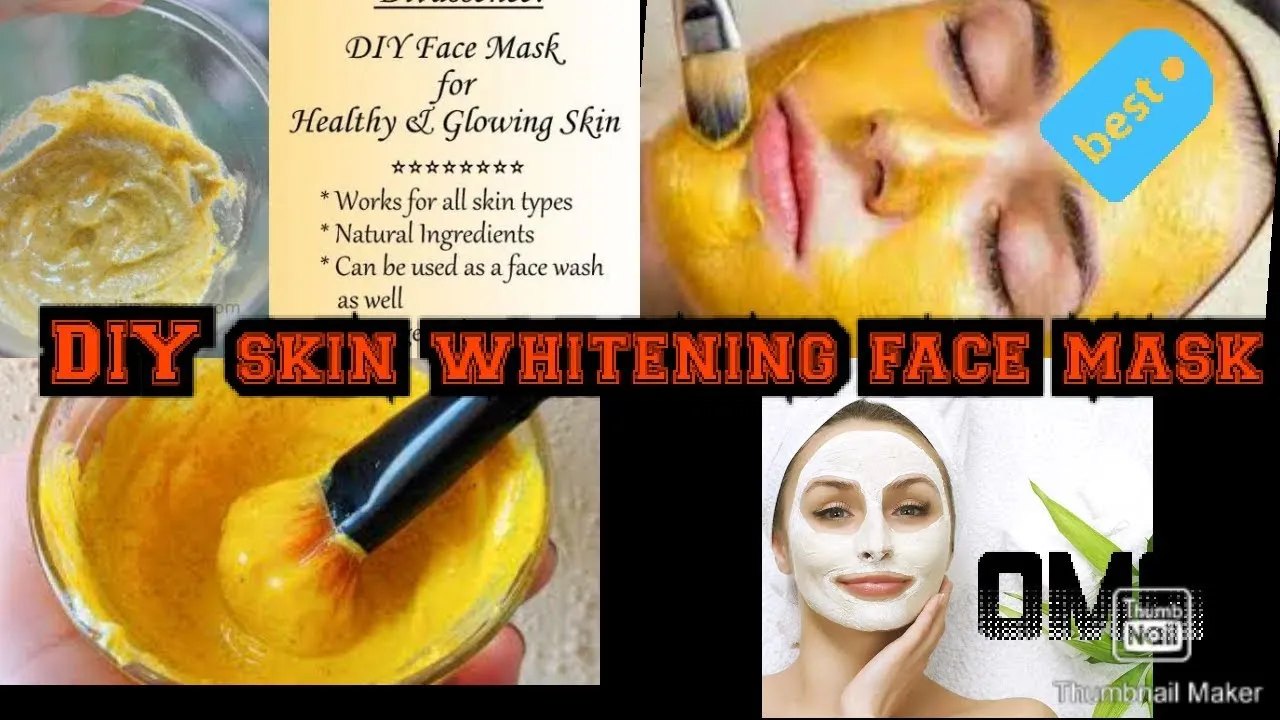
Several natural ingredients are renowned for their skin-whitening properties. Turmeric, containing curcumin, is a potent antioxidant and anti-inflammatory agent that can help lighten skin and reduce dark spots. Lemon juice, rich in vitamin C, inhibits melanin production and brightens the skin, but should be used cautiously due to its acidity. Yogurt and milk, containing lactic acid, offer gentle exfoliation, promoting cell turnover and revealing brighter skin. Honey provides hydration and has antibacterial properties, aiding in overall skin health. Papaya contains enzymes that gently exfoliate and brighten the skin. Aloe vera and cucumber help soothe and hydrate the skin while reducing inflammation, creating a more even skin tone. Coffee and coconut oil offer exfoliating and moisturizing properties respectively, improving skin texture and appearance. Rice flour is another gentle exfoliator and can help reduce pigmentation. These ingredients, when combined, create powerful masks.
Ingredients to Avoid

While many natural ingredients are beneficial, some should be avoided or used with extreme caution in DIY whitening face masks. Ingredients that can cause irritation, such as high concentrations of essential oils or harsh exfoliants, should be avoided, especially if you have sensitive skin. Certain citrus fruits, like lime, should be used sparingly due to their high acidity, which can cause photosensitivity, making your skin more susceptible to sun damage. Always do a patch test with any new ingredient before applying it to your entire face. Be wary of products marketed as instant whitening agents, as they may contain harmful chemicals. Always prioritize safety and skin health over immediate results. Researching and understanding the potential effects of each ingredient is crucial before incorporating it into your mask.
Top DIY Whitening Face Mask Recipes
Turmeric and Yogurt Mask
This mask combines the anti-inflammatory and antioxidant properties of turmeric with the exfoliating and moisturizing benefits of yogurt. Mix 1 teaspoon of turmeric powder with 2 tablespoons of plain yogurt to form a smooth paste. Apply the mask evenly to your face, avoiding the eye area. Leave it on for 15-20 minutes, then rinse thoroughly with lukewarm water. This mask can help reduce dark spots, even out skin tone, and provide a healthy glow. Turmeric’s curcumin helps inhibit melanin production, while yogurt’s lactic acid gently exfoliates, revealing brighter skin. Use this mask once or twice a week for best results. Remember to use a small amount of turmeric to avoid staining the skin.
Lemon and Honey Mask

Lemon juice is known for its skin-brightening properties due to its high vitamin C content, while honey provides hydration and antibacterial benefits. Mix 1 teaspoon of fresh lemon juice with 1 tablespoon of honey. Apply this mixture to your face, and let it sit for about 10-15 minutes. Rinse off with lukewarm water. It is essential to use this mask with caution, as lemon juice can cause photosensitivity. Avoid sun exposure after using this mask, and always perform a patch test first. This mask helps reduce dark spots and brighten the skin, but should only be used once a week, due to the potential for irritation. This combination is great for revitalizing and refreshing your skin.
Oatmeal and Milk Mask
This gentle mask is ideal for sensitive skin, combining the soothing and exfoliating properties of oatmeal with the hydrating benefits of milk. Mix 2 tablespoons of ground oatmeal with 3 tablespoons of milk (cow’s milk or plant-based). Apply the paste to your face and leave it on for 15-20 minutes. Rinse with lukewarm water. This mask helps exfoliate dead skin cells, reduce redness, and brighten the skin. Oatmeal gently removes impurities, and milk’s lactic acid aids in skin renewal. This mask can be used two to three times a week to promote a brighter, smoother complexion. It’s an excellent choice for those looking for a mild yet effective whitening treatment.
Papaya and Honey Mask
Papaya contains enzymes that gently exfoliate and brighten the skin, while honey provides hydration and antibacterial properties. Blend a small piece of ripe papaya until it forms a smooth pulp. Mix 1 tablespoon of papaya pulp with 1 teaspoon of honey. Apply the mask to your face and let it sit for 15-20 minutes. Rinse off with lukewarm water. This mask is suitable for most skin types and helps reduce dark spots and brighten the skin. Papaya’s enzymes help remove dead skin cells, while honey nourishes and hydrates. This mask can be used twice a week for best results. Enjoy the refreshing and revitalizing effect of this mask, leaving your skin feeling soft and radiant.
Aloe Vera and Cucumber Mask

This mask is perfect for soothing and hydrating the skin while providing a mild whitening effect. Blend a few slices of cucumber with fresh aloe vera gel to create a smooth paste. Apply the mask to your face and leave it on for 15-20 minutes. Rinse with cool water. The cucumber helps reduce inflammation and provides a cooling sensation, while aloe vera hydrates and soothes the skin. The combination works to even out skin tone and give a refreshing feel. This mask can be used daily, making it a great addition to a daily skincare routine. The natural ingredients promote a healthy complexion and keep your skin hydrated.
Coffee and Coconut Oil Mask
Coffee acts as a gentle exfoliator and helps improve blood circulation, while coconut oil moisturizes and nourishes the skin. Mix 1 tablespoon of ground coffee with 1 tablespoon of melted coconut oil. Apply the mixture to your face and massage gently in circular motions for a few minutes. Leave the mask on for about 15 minutes, then rinse with lukewarm water. This mask helps exfoliate, brighten skin, and improve overall texture. The coffee grains remove dead cells, while coconut oil provides hydration. Use this mask once or twice a week for best results. This mask is easy to make and a great way to give your skin a revitalizing boost.
Rice Flour and Milk Mask
Rice flour is a gentle exfoliator and can help reduce pigmentation. Milk offers hydrating benefits, creating a soft and glowing skin. Mix 2 tablespoons of rice flour with enough milk (cow’s or plant-based) to form a smooth paste. Apply this mask to your face and leave it on for 15-20 minutes. Rinse with lukewarm water. This mask helps reduce dark spots, even out skin tone, and brighten the complexion. The gentle exfoliation from the rice flour promotes a healthy glow. For best results, use this mask two to three times a week, combining traditional beauty secrets. This mask is an excellent choice for those seeking a gentle yet effective skin whitening treatment.
Step-by-Step Guide to Making a Mask

Preparing Your Skin
Before applying any face mask, preparing your skin is crucial to maximize its benefits. Start by cleansing your face with a gentle cleanser to remove dirt, oil, and makeup. Pat your skin dry with a soft towel. Some people prefer to steam their face for a few minutes to open pores, which can enhance the mask’s effectiveness, though this step is optional. Doing a patch test on a small area of skin, like the inner forearm, before applying a mask to your entire face is highly recommended. This helps identify any potential allergic reactions or sensitivities to the ingredients. Preparing your skin sets the stage for the mask’s ingredients to work their magic, ensuring a deeper and more effective treatment.
Mixing the Ingredients
Mixing the ingredients correctly is key to creating a mask that is effective and pleasant to use. Always measure ingredients accurately. Use a clean bowl and a non-metallic spoon or spatula to mix. Follow the specific recipe instructions carefully to get the right consistency. For masks with dry ingredients, like turmeric or rice flour, ensure they are thoroughly mixed with the liquid components, like yogurt or honey, to form a smooth paste. If a mask seems too thick, add a bit more liquid; if it’s too thin, add a bit more of the dry ingredients. Proper mixing ensures an even application and the effective delivery of the active ingredients. Achieving the right texture helps the mask adhere to the skin, maximizing its benefits.
Applying the Mask

Applying the face mask correctly ensures an even coverage and optimal absorption of ingredients. Use clean fingertips or a soft brush to apply the mask to your face, avoiding the sensitive eye and lip areas. Apply an even layer, ensuring the skin is entirely covered, but not too thick. Relax and let the mask sit for the recommended time. Avoid talking or making facial expressions, as this can crack the mask and reduce its effectiveness. Applying the mask in a calm, quiet environment can enhance the experience and allow you to fully relax. Make the application process a mindful part of your skincare routine, enhancing your skin health, and promoting self-care.
Rinsing and Aftercare
Once the mask has set for the recommended time, it’s essential to rinse it off properly. Use lukewarm water to gently rinse the mask, making sure all traces of the mask are removed. Avoid using hot water, as it can strip your skin of its natural oils. Pat your face dry with a soft towel. After rinsing, apply a gentle, hydrating moisturizer to lock in moisture and soothe your skin. If the mask contains any ingredients that can cause sun sensitivity, it’s important to avoid sun exposure or apply sunscreen. Proper rinsing and aftercare complete the process, ensuring the mask’s benefits are maximized and the skin remains healthy and balanced. Proper rinsing sets the stage for your skin to receive moisture and nourishment.
Tips for Maximizing Results
Consistency is Key
Consistency is crucial when using DIY whitening face masks. Regular application, as recommended for each mask recipe, helps achieve the best results. Skin brightening is a gradual process; noticeable changes may take several weeks or even months. Integrate face masks into your regular skincare routine, following the recommended frequency for each mask. Avoid skipping applications, and be patient. Combining face masks with other skincare practices, such as gentle cleansing, regular exfoliation, and a healthy diet, can further boost results. Consistent use ensures that the active ingredients work effectively over time. Maintain a consistent skincare routine to see the desired skin brightening and overall improvement in your skin’s health.
Sun Protection
Sun protection is paramount when using whitening face masks. Many ingredients used in these masks, such as lemon juice, can make your skin more sensitive to the sun. Exposure to UV rays can reverse the whitening effects and even cause further skin damage, like dark spots. Apply a broad-spectrum sunscreen with an SPF of 30 or higher every morning, regardless of the weather. Reapply sunscreen throughout the day, especially if you are spending time outdoors. Wearing protective clothing, such as hats and long sleeves, can also help shield your skin from the sun. Make sun protection an integral part of your skincare routine to maintain the results achieved through whitening masks and protect your skin from premature aging and damage. Protect your skin with a good sunscreen.
Patch Test Before Use
Before applying any DIY face mask to your entire face, always perform a patch test. Apply a small amount of the mask to a hidden area of your skin, such as the inner forearm or behind your ear. Wait for 24-48 hours to check for any adverse reactions, such as redness, itching, or irritation. If you experience any of these symptoms, discontinue use immediately. Patch testing helps identify any potential allergic reactions or sensitivities to the ingredients in the mask. If no adverse reactions occur, it should be safe to use the mask on your face. This precautionary step can prevent discomfort and ensure the mask is suitable for your skin type. Always prioritize safety, conducting a patch test, and knowing your skin’s tolerance to certain ingredients.
Potential Risks and Side Effects
Allergic Reactions
Allergic reactions are a potential risk when using any new skincare product, including DIY face masks. Ingredients like honey, lemon, or certain essential oils can cause allergic reactions in sensitive individuals. Symptoms may include redness, itching, swelling, or hives. If you experience any signs of an allergic reaction, stop using the mask immediately and consult a dermatologist or healthcare provider. Always do a patch test before applying a new mask to your entire face. If an allergic reaction occurs, wash the area with cool water and avoid scratching. Be aware of your skin’s response to each ingredient, and be prepared to identify and manage allergic reactions.
Skin Sensitivity
Some ingredients, particularly those with high acidity or exfoliating properties, can cause skin sensitivity. Lemon juice and certain essential oils can make the skin more susceptible to irritation, redness, and dryness. Using these ingredients in high concentrations or applying them too frequently can worsen these effects. If you have sensitive skin, it’s crucial to dilute strong ingredients and use them sparingly. Watch your skin for any signs of sensitivity, such as burning or stinging sensations. If you notice these, reduce the frequency of mask use or dilute the ingredients. Choosing gentler ingredients, and performing patch tests before use can help prevent skin sensitivity issues. Choose ingredients carefully for better results.
When to Consult a Dermatologist
If you experience persistent skin irritation, allergic reactions, or if you are not seeing the desired results from DIY face masks, it’s essential to consult a dermatologist. A dermatologist can assess your skin type, diagnose any underlying skin conditions, and recommend professional treatments. They can also provide tailored advice on how to safely incorporate DIY masks into your skincare routine or suggest alternative solutions. If you have significant pigmentation issues or are concerned about skin health, professional guidance is always best. A dermatologist can offer expert advice. Seeking professional help is an important step in managing your skincare, especially if issues arise or you’re unsure how to proceed.