What Causes Nail Discoloration
Nail discoloration can be a frustrating cosmetic issue, often signaling underlying problems or lifestyle factors. Understanding the root causes of this discoloration is the first step toward effective treatment. The natural color of healthy nails should be a pale, slightly pinkish hue, allowing the underlying capillaries to show through. When nails deviate from this norm, it’s usually a sign that something is affecting their health or structure. Discoloration can manifest in various forms, including yellowing, browning, or the appearance of dark spots or streaks. These changes can impact one or all of the nails, and the degree of discoloration can vary from slight tints to significant, noticeable changes. Addressing the issue starts with identifying the triggers and then taking the appropriate steps for healthy and beautiful nails.
Common Causes
Several factors contribute to nail discoloration. Fungal infections are a common culprit, often resulting in yellowing, thickening, and even crumbling of the nail. These infections can be persistent and require specific antifungal treatments. Trauma to the nails, such as from injury or repeated pressure, can also cause discoloration. This may appear as dark spots or bruising under the nail, and it usually resolves as the nail grows out. Another widespread cause is the use of dark nail polish. The pigments in these polishes can stain the nail plate, especially if a base coat isn’t used to protect the nail’s surface. Exposure to chemicals, such as those found in cleaning products or certain cosmetic treatments, can also lead to discoloration. Understanding these common causes is crucial for choosing the right methods to whitening nails.
Lifestyle Factors

Lifestyle choices play a significant role in the health and appearance of your nails. Smoking, for example, can lead to yellowing of the nails due to nicotine and tar buildup. Dietary deficiencies, especially a lack of essential vitamins and minerals, can also contribute to discoloration and other nail problems. Iron deficiency, for example, can cause the nails to become brittle and spoon-shaped. Regular exposure to harsh environments, such as excessive water exposure or working with chemicals without proper protection, can also cause nail discoloration. These environmental factors can damage the nails, making them more susceptible to staining and other issues. Maintaining a balanced diet, avoiding smoking, and protecting your nails from environmental stressors are important for keeping nails healthy.
Baking Soda The Ultimate Whitening Agent
Baking soda, or sodium bicarbonate, is a versatile household ingredient with a wide range of uses. Beyond its common applications in baking and cleaning, baking soda also offers cosmetic benefits, particularly for nail care. Its mild abrasive properties make it a gentle yet effective exfoliant, helping to remove stains and brighten the nails. Baking soda is alkaline, which can help to neutralize acids that may contribute to nail discoloration. This property helps to lift stains and brighten the nail surface. Additionally, it can help to reduce the buildup of residue from nail polish, soaps, and other products. Using baking soda as a nail treatment is a simple, natural, and affordable way to address nail discoloration.
How Baking Soda Works on Nails
The effectiveness of baking soda for whitening nails lies in its chemical properties and mild abrasive action. As a gentle abrasive, baking soda helps to remove surface stains and impurities, revealing the natural color of the nail. When applied as a paste or soak, baking soda can help to break down stains caused by nail polish, environmental factors, and other substances. Its alkaline nature helps neutralize acids and reduce buildup, further contributing to the cleaning and whitening process. In addition, the slight scrubbing action helps to exfoliate the nail surface, removing dead cells and promoting healthy nail growth. With consistent use, baking soda can restore the brightness and clarity of your nails, offering a safe and natural method for addressing discoloration.
Benefits of Baking Soda for Nail Whitening

Using baking soda for nail whitening offers several advantages. It is a natural and affordable alternative to commercial nail treatments. Baking soda is readily available in most households, making it a convenient solution for addressing nail discoloration. Unlike some chemical treatments, baking soda is gentle and less likely to cause irritation or damage to the nails. Its mild abrasive properties make it effective at removing stains without harming the nail plate. Baking soda is also a versatile treatment that can be combined with other ingredients, such as lemon juice or hydrogen peroxide, to boost its whitening effects. The regular use of baking soda not only whitens the nails but can also contribute to overall nail health by removing buildup and promoting a cleaner surface, which can improve nail appearance.
Top 5 Baking Soda Nail Whitening Tricks
Trick 1 Baking Soda Paste
A simple baking soda paste is a great starting point for whitening nails. This method is easy to prepare and apply, making it a convenient option for regular use. The paste works by directly targeting stains and discoloration, offering a straightforward way to improve nail appearance. Applying the paste helps to exfoliate the nail surface, removing dead cells and revealing a brighter, cleaner nail. Consistent use can help to gradually lighten the nails, reducing yellowing and other forms of discoloration. For best results, it’s recommended to use this paste a few times per week. The paste is gentle enough for frequent use without causing damage. This technique is suitable for all nail types and can be easily incorporated into any nail care routine.
How to Prepare the Paste
To prepare the baking soda paste, you’ll need baking soda and water. Start by mixing one tablespoon of baking soda with enough water to form a thick paste. The consistency should be similar to toothpaste, so it’s easy to apply to the nails. Use a small bowl or container to mix the ingredients thoroughly, ensuring there are no lumps. You can adjust the amount of water to achieve the desired consistency. If the paste is too thick, it will be difficult to spread evenly. If it’s too thin, it may not adhere well to the nails and not be as effective. It’s important to use clean water to prevent introducing any impurities to the mix. Freshly prepared paste is best to ensure its effectiveness.
Application and Usage
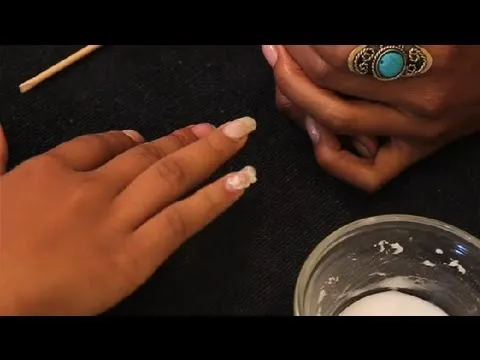
To apply the baking soda paste, start by cleaning your nails and removing any existing nail polish. Using a small brush or your fingertips, apply a thin layer of the paste to each nail, ensuring complete coverage. Gently scrub the paste onto the nail surface using circular motions for about 1-2 minutes. This gentle scrubbing action helps to exfoliate the nail surface and remove any stains. After scrubbing, let the paste sit on the nails for about 5-10 minutes. Rinse the nails thoroughly with warm water, ensuring all the paste is removed. Dry your nails completely with a clean towel. For best results, apply the baking soda paste 2-3 times per week. This consistency helps to maintain brightness and clarity.
Trick 2 Baking Soda and Lemon Juice
Combining baking soda with lemon juice creates a powerful whitening treatment. Lemon juice contains citric acid, which acts as a natural bleaching agent. It can help to lighten stains and brighten the nails, making it a great addition to the baking soda. This combination boosts the effectiveness of the treatment, resulting in faster and more noticeable whitening results. While baking soda provides the gentle scrubbing action, lemon juice enhances the cleaning properties, together, they can effectively target discoloration. This method is a simple way to enhance the natural brightening potential of both ingredients, yielding excellent nail whitening results.
Benefits of Lemon Juice

Lemon juice offers multiple benefits for nail whitening. Its high acidity helps to break down stains and discoloration. The citric acid in lemon juice acts as a natural bleaching agent, helping to lighten the nails. The juice also contains vitamins and antioxidants. These help to promote overall nail health and strength. Additionally, lemon juice has natural antibacterial properties. This can help to prevent infections and keep the nails clean. Lemon juice, when combined with baking soda, enhances its whitening potential, making the treatment more effective. Adding this combination regularly can improve the look and health of your nails.
Mixing and Application
To prepare this mixture, mix one tablespoon of baking soda with the juice of half a lemon. Mix it thoroughly until a paste forms. If the paste is too thick, add a little more lemon juice to adjust the consistency. Apply the paste directly to your nails, ensuring complete coverage. Gently scrub the nails for about 1-2 minutes. After scrubbing, let the mixture sit for around 5-10 minutes. Rinse your nails with warm water and dry them thoroughly. Use this treatment once or twice a week. This combination provides a strong whitening effect.
Trick 3 Baking Soda and Hydrogen Peroxide
Combining baking soda and hydrogen peroxide is another effective whitening treatment. Hydrogen peroxide is a mild antiseptic and bleaching agent. It can further boost the whitening properties of baking soda. The combination works by providing both abrasive cleaning and oxidation. Hydrogen peroxide helps to break down stains, offering a deeper cleaning action. This method is more intensive, resulting in visible whitening effects. The combination can be used to address stubborn discoloration and improve the overall appearance of your nails. This combination provides a strong and effective solution for those looking to restore the natural beauty of their nails.
Using Hydrogen Peroxide Safely

When using hydrogen peroxide, it’s important to take a few precautions. Always use a 3% solution of hydrogen peroxide. Stronger concentrations can be too harsh and can cause irritation or damage. Avoid getting the mixture on your skin, as it can cause temporary irritation or slight bleaching. If you have sensitive skin, perform a patch test before applying the mixture to all your nails. Apply a small amount to a single nail and wait for a few minutes to check for any adverse reactions. Always wear gloves during application to protect your skin. Avoid prolonged exposure to the mixture. Rinse your nails thoroughly with water after treatment. If you notice any redness, burning, or discomfort, discontinue use and consult a healthcare professional.
Mixing and Application Guide
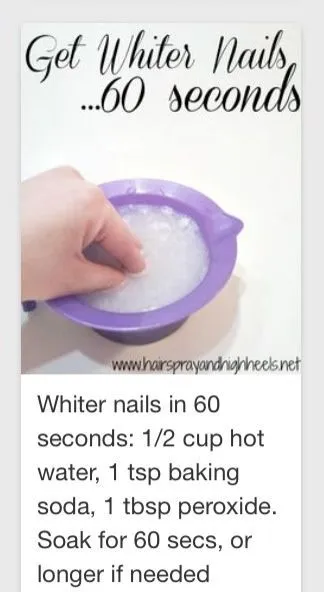
To prepare the baking soda and hydrogen peroxide mixture, mix one tablespoon of baking soda with one teaspoon of 3% hydrogen peroxide. Mix until it forms a paste. Apply the paste directly to your nails, ensuring complete coverage. Let it sit on your nails for about 2-3 minutes. Rinse thoroughly with warm water, ensuring all traces of the mixture are removed. Dry your nails with a clean towel. Apply this treatment once a week, as it is a stronger mixture. The mixture is safe for use when the instructions are followed carefully. This method can effectively whiten nails.
Trick 4 Baking Soda and Toothpaste
Using baking soda with toothpaste is another option to whiten your nails. Toothpaste often contains mild abrasives and whitening agents, which enhance the cleaning effects of baking soda. This method combines the gentle exfoliating action of baking soda with the stain-removing properties of toothpaste. It is an accessible and easy-to-use solution for achieving brighter nails. Combining these ingredients provides a comprehensive treatment for nail discoloration and promotes overall nail health. This can be a beneficial option for anyone seeking a simple and effective home remedy for nail whitening.
Choosing the Right Toothpaste

When selecting a toothpaste for nail whitening, it’s important to choose the right type. Opt for a whitening toothpaste that contains mild abrasives. These abrasives are effective at removing stains without damaging the nail surface. Look for toothpastes with ingredients like silica or hydrated silica, which are gentle yet effective for cleaning. Avoid toothpastes with harsh chemicals or strong bleaching agents. These may be too abrasive and can potentially harm the nails. Check the ingredient list for any additives, such as artificial colors or flavors, that might cause irritation. A simple whitening toothpaste with the right components is more effective for nail whitening.
Application Method
Apply the mixture by mixing a small amount of baking soda with your chosen toothpaste. Mix them into a paste. Apply a thin layer of the paste to each nail, ensuring all areas are covered. Gently scrub the nails for about 1-2 minutes using a soft toothbrush or your fingertips. This helps to remove stains and polish the nail surface. Let the mixture sit on the nails for about 2-3 minutes. Rinse your nails thoroughly with warm water to remove all traces of the mixture. Dry your nails completely with a clean towel. Use this treatment once a week. Following these steps can help improve the brightness of your nails.
Trick 5 Baking Soda Soak
A baking soda soak is a relaxing and effective method to whiten your nails. This involves soaking your nails in a solution of baking soda and water. The soak helps to gently remove stains and discoloration. This allows the baking soda to reach the nail surface, offering a thorough and easy treatment. The soaking method is particularly effective for addressing widespread discoloration. It’s also beneficial for softening cuticles. A baking soda soak is a simple and easy way to promote cleaner, whiter nails. This is a gentle and relaxing method that is great for maintaining the health of your nails.
Preparing the Soak
Prepare the baking soda soak by filling a small bowl with warm water. Add about one to two tablespoons of baking soda to the water. Stir the mixture until the baking soda is fully dissolved. Ensure the water temperature is comfortable. Very hot water can dry out your nails. You can adjust the amount of baking soda based on the size of the bowl and your preference. The goal is to create a slightly alkaline solution that helps to lift stains and brighten the nails. Make sure the bowl is clean and free from any residues. Using clean water is a basic measure to maintain hygiene and effectiveness.
Soaking Instructions
Soak your nails in the baking soda solution for approximately 10-15 minutes. Ensure that your nails are fully submerged in the solution. This allows the baking soda to penetrate the nail surface. After soaking, gently scrub your nails with a soft toothbrush or a nail brush. This helps to remove any loosened stains and impurities. Rinse your hands and nails thoroughly with clean water. Dry your hands completely with a clean towel. Repeat this treatment once or twice a week. It provides a safe and efficient method for whitening nails.
Important Considerations and Tips
Safety Precautions
It is important to observe some safety precautions when using baking soda for nail whitening. Always perform a patch test before applying any baking soda mixture. This will help to test for potential allergic reactions or sensitivities. Avoid prolonged exposure to any of the mixtures. Overexposure can cause dryness or irritation. If you experience any adverse reactions, such as redness, itching, or burning, discontinue use immediately. Rinse your nails thoroughly with water and consult a healthcare professional if needed. Keep baking soda and the mixtures out of reach of children. When using hydrogen peroxide, follow the safety guidelines. Always use diluted solutions and avoid contact with the skin.
Frequency and Consistency
Consistency is key when using baking soda for nail whitening. For best results, apply the treatments regularly. The frequency of use will vary based on the method and the severity of the discoloration. For simple pastes and soaks, 2-3 times a week is often sufficient. For stronger mixtures, such as those with hydrogen peroxide, once a week is often sufficient. Don’t overuse the treatments. Doing so can cause your nails to dry out or become irritated. Evaluate your nails’ condition and adjust the frequency accordingly. Be patient. Nail whitening takes time. Consistent application is important for seeing noticeable improvements.
Alternative Nail Whitening Methods
Besides baking soda, several alternative methods can help with nail whitening. These treatments can be used alone or in combination with baking soda for improved results. Consider trying these methods to enhance the effectiveness of your nail whitening routine. These methods offer different approaches to address nail discoloration, allowing you to customize your care based on your specific needs and preferences.
Professional Treatments
Professional nail treatments are available for nail whitening. These treatments can provide faster and more dramatic results. A nail technician can assess the causes of discoloration and suggest the most effective solutions. Professional options can include chemical peels and specialized whitening treatments. These treatments are usually administered in a salon setting, which ensures the process is done safely and effectively. Professional treatments are suitable for stubborn cases of discoloration. If your nail discoloration is severe or persistent, consult with a professional. They can provide expert care and guidance to help you get the desired results.
Home Remedies
In addition to baking soda, several home remedies can help with nail whitening. Lemon juice, as discussed earlier, is a great addition to the routine. It can be applied on its own or combined with other ingredients. Apple cider vinegar can help to remove buildup and restore nail health. Coconut oil can help moisturize and nourish the nails, promoting overall health. A combination of these home remedies with baking soda can enhance the whitening effects. These home remedies are accessible and cost-effective, allowing you to implement the techniques into your nail care routine. Remember to be consistent with the treatment, and you will eventually see noticeable results.
Maintaining Healthy and White Nails
Maintaining healthy and white nails goes beyond occasional treatments. Regular care and attention are essential for long-term results. Some important measures include avoiding harsh chemicals and protecting nails from trauma. A balanced diet rich in vitamins and minerals helps keep nails healthy and strong. Keeping your nails trimmed and clean is another important aspect of maintaining them. Consider adding a base coat when applying nail polish. Following these steps can enhance the results of any whitening treatment and help keep nails bright. Maintaining healthy nails improves your overall health and appearance.
In conclusion, baking soda is an effective, natural, and affordable option for whitening nails. Its gentle abrasive properties and ability to be combined with other ingredients like lemon juice and hydrogen peroxide make it a versatile treatment. By understanding the causes of nail discoloration and applying these baking soda tricks, you can restore the natural brightness of your nails. Remember to maintain consistent care and follow safety precautions. With the right approach, you can enjoy healthy, beautiful, and white nails.